Display data on image on Thingsboard
Here we will see, how to Display data on Image on Thingsboard. Assuming you know, how to create a device and dashboard on thingsboard . If you don’t know, how to create a device and dashboard on thingsboard, please click on the following links.
Creating a device on thingsboard
Creating a dashboard on thingsboard
1)First navigate to DASHBOARDS and click on dashboard where you want to display data on image. Here inside TemperatureAndHumidity dashboard we will display data on image.

2)Inside TemperatureAndHumidity dashboard, click on Enter edit mode. shown in below image.

3)Click on Add new dashboard
click on Create new dashboard

4) Select widget as Cards
Click on LATEST VALUES and double click anywhere on Label widget

5)ADD: click on ADD to add data sources
Entity: select entity
Timeseries: select data resources

6)Now Click on ADVANCED
Drag and drop or upload image

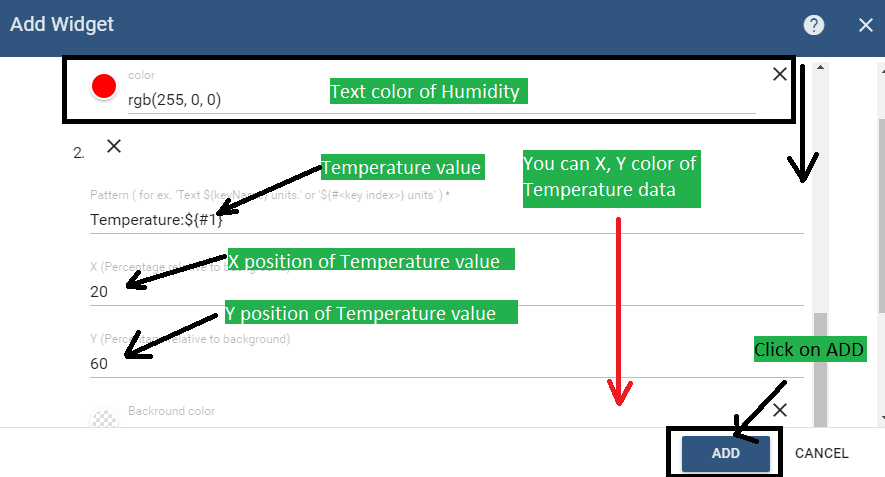
7)Under labels fields you can add number of resources which you want to display on image with position and color of data . shown in below image.
Pattern: How you want to display data on image .for example you want to display Humidity:60 units on image then you can use Humidity:${#0} units where ${#0} represents Humidity value. Index 0 because we selected Humidity source as first, please see step 5.
X: X position of Data
Y: Y position of data
COLOR: Color of text

8)Click on +NEW to add second source and entered pattern as Temperature:${#1} where ${#1} represents Temperature value and click on ADD.
9)Now click on Apply changes.
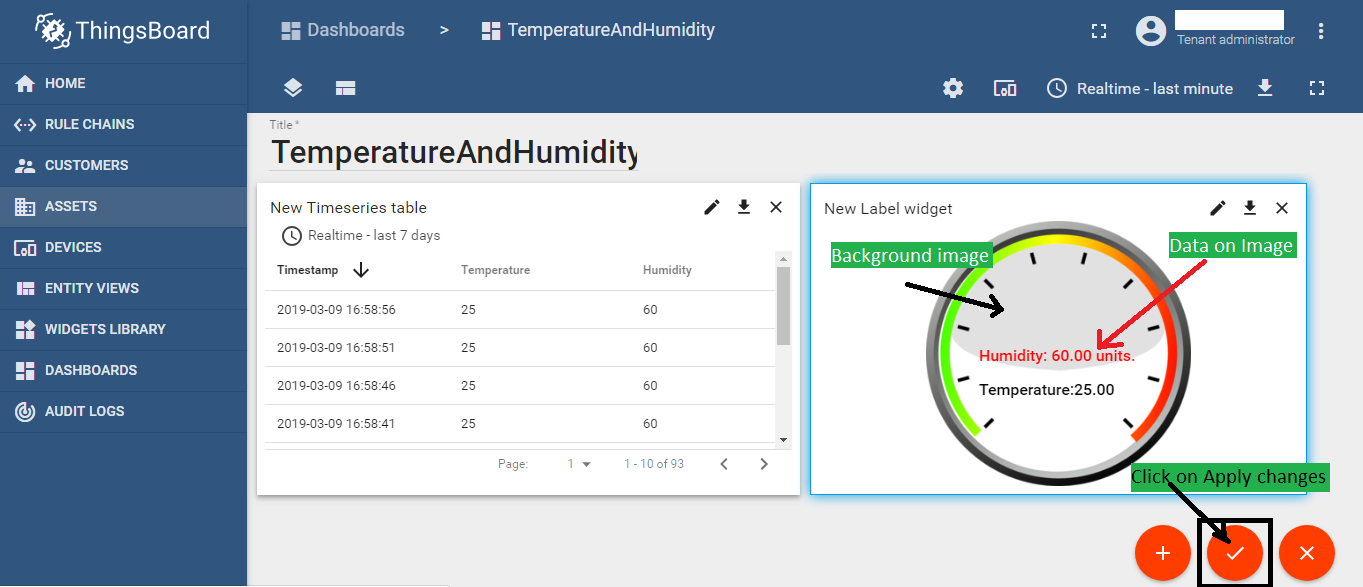
Congrats you have successfully displayed data on image on thingsboard.
